These days turning imagination into reality at home is more real than ever. RepRap movement made fused deposition modeling technology affordable. Turning a figurine or mathematical object into physical object is exciting and funny and using 3D printer to fabricate mechanical constructions or replacement parts makes it another tool on a workbench. Yet 3D printing is far away from “Ctrl+P… ready” approach.
Let me share the perspective of newcomer to this technology. I have never owned or created any CNC machine and 3D printer belongs to this category. On the other hand I have enough skills to build machine and electronics, proven by bunch of household devices already repaired.
Assembly
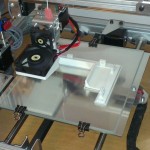
I bought DIY kit of GATE printer from local company 3novatica.com to save time on choosing and collecting components and money on completely build printer. Proprietary frame, rods, grips and holders made of aluminum or steel was more convincing than classic RepRap built partially from plastic parts. That is all about stiffness so that rapidly moving printer blocks do not impact quality of print. Assembling mechanics was exciting time that took 3 long evenings with a little hassle of missing screws, wrongly marked details etc. Adding steering electronic board and wiring for stepping motors and heating elements was just piece of cake as it is my mainstream hobby. Fourth day 3D printer was brought to life. And the daunting experimentation took me tens of hours of trial-and-error, mostly error at the beginning…
Physics of extrusion
Looking at amazing home-made printouts on Youtube or blogs makes false impression: it is so easy. After I tried it myself I realized it is all about show off. I did not expect massive gap between first printouts and those masterpieces. I assumed it is just about applying specific printing profiles so that machine does it optimally. And I was plain wrong. These printouts are combined results of experience, meticulous setup and many hours (to days!) of printing itself.
Turning 3D object into series of orders of machines is first problem to tackle. You need to inspect visually if generated “sliced” object can be printed. Tens of parameters must be provided by the user. Some of them are universal and work cross-printers, other must be iterated over, tuned print by print to find best results because they are specific to mechanics used in this particular printer. Even though I got default profiles for PLA and ABS plastics for my printer, these settings are good only for some type of prints, more like a starting point.
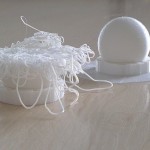
Printer parametrization is even worse when combined with physics of plastics. For instance PLA plastic melts in different temperature that ABS and requires different treatment to stick to base during printing. Sounds easy, just set it and done. Wrong. Changing a little extrusion temperature (like from 230C to 240C for ABS) gives different flux of melted plastic and will impact corners quality, creation of threads when hotend is moved with weak filament retraction etc. It is even worse because whatever you have learnt for let say white PLA material, does not apply to black PLA as pigments change physical properties. And if you change producer of the same “white PLA” just prepare for starting over with every optimizations, chances are they just use totally different chemistry.
Cooling
Cooling deserves separate paragraph as it creates pain in the back on its own. Just by comparing ABS and PLA, two most popular plastics, you grow your personal expertise (that ideally should be hidden behind “Ctrl+P” kind of automation). ABS does not like cooling – it curls massively when cooled too fast: printing small objects (few centimeters of each dimension) was easy, then I needed to print massive ABS block covering half of printing bed. Each time in the middle of print I heard cracking sound and one of model corners was curling up few millimeters up from the bed messing up the whole printout: when it pops up, header moving horizontally in X-Y dimension hits the model, melts it and tear off the bed, and hot end needs to be cleaned with acetone to get rid of burning plastic that later falls of and make black dirt spots on another print. My printer does not have closed chamber and printing ABS in my conditions requires some invention: large cardboard box wrapping whole printer, with top removed, is enough to keep constant temperature around printed object and works even when I open window that was usually breaking printout immediately.
In contrast PLA likes active cooling. Printing overhangs on small object makes curling if previous layer is still hot. Sharp edges of narrow-angle overhangs curl up and in most cases lead to failure, either by hot-end tearing off the whole printout or one of belts on any axis jumping its teeth and leading to offset on printout.
PLA is very adhesive so the base heated up to 50C is fine. But when active cooling is applied it has to be done cautiously. When printing first layer that must stick to glass of bed, fan should not blow too much otherwise it cools heated bed and printout may not stick to it.
Speed and small objects
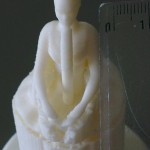
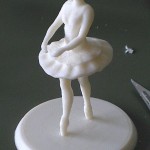
Printing layer by layer must be slow if quality is demanded. I did not realized it must be *so* slow! I eagerly started with tiny objects like 4x4x4cm just to fail badly even using printing profile provided by company selling DIY kit and typical 30mm/s speed. Watching the process I deduced problem of too slow cooling. Even though my printer has aluminum thermal shield between heating block and printed object it was still too hot. Hot-end was visiting the same areas too quick restraining object from cooling off properly and messing up the whole result. Even using larger fan then factory provided (6x6cm replacing 4x4cm, with 3 times biger air flux) did not help much. It was painful waste of time and material, especially I planned to save on both. Printing figurine of ballet dancer with base of 4x4cm and 8cm height failed 3 times in a row in attempt to print it in 60 minutes with 0.2mm layer. Days later I approached the same figurine with 4 hours print and active cooling and succeeded. So cooling is critical again and I either print couple small elements at once or slow down massively even down to 10mm/s.
Struggle for perfect surface
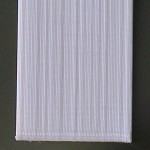
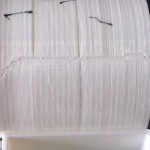
Printing with fused filament makes visible horizontal layers. I did not expect though that I will struggle with other artifacts coming from mechanical interference. When looking at certain angle (when light fall long the wall perpendicular to layer so that any bumps on the wall make shadows) there are stripes every few layers. On some prints they are every millimeter, on other they are irregular. I observed that they appear when different plastic is used so it is not induced by filament irregularities. Stripes have the same distance when printing box or cone shape, so it is not extrusion problem (on cone stripes would be less dense going up if problem is function of extruded plastic). I did calibration of extruder steps that should fight stripes for particular filament type, but didn’t.
Before this I ignored the fact that aluminum couplers (clutches) for Z axis do some eccentric moves and threaded rod do the circles on top of it. Some stripes were occurring in 1mm distance and this is exactly one turn of Z-axis stepper. Convinced by technical support I did review of whole construction for any misalignment and lack of orthogonality – I dismantled whole Z axis, X-end and others and reassembled even more carefully. As threaded rods were little bent I bought new ones. All that just to get a slightly better results (placebo?). Technical support insist that properly tighten aluminum couplers will not get any eccentric movements. I did not agree and bought on aliexpress.com pair of new ones just to test my idea.
Edit: new couplers and threaded rods did not fix it, over time I reassembled X-axis and followed the advice that threader rods must be ideally centered with stepper motor coupler, in my case they were nearly 1mm off center and to make this ideal I widened holes in aluminum construction to be surprised again and got way smoother surface! Slight irregularity of thread on rod that was pushed to side of a nut in non-centric assembly was producing these bands despite stiffness of metal elements of Z-axis (see this post in my thread in polish).
Despite surface imperfections and bargain with printing process I am glad I got this entry level $1000 device. The goal is met: making custom cases for my electronics is now part of my humble workbench.

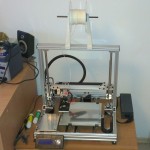
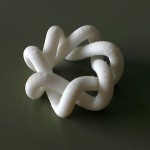
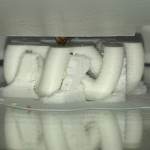
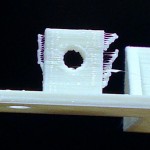


Could you add some paragraph or add comment telling us what do you think about that printer and printing in general after half year of using it/printing? Anything important after gaining experience.
Still best value to its price, 3000pln ($800 at the moment) for a full aluminum/steel framed self-assembly kit. It works without any significant issues. I cannot give arbitrary answer as I did not have any other printers to compare with. Problems I face are purely related to FFF/FDM process (printing too small / too fast, printing bridges etc). I started using kapton tape with abs juice and now abs prints are rock solid placed etc. I still see the process is a problem, not the printer itself. You have to dedicate a lot of time if you never done 3d printing before. Whatever you find attractive on inet/youtube is author’s show-off, best of results they could get; usualy away from reality.
Now I am looking for two-extruders printer because removing support from complex hollow objects driving me nuts (and HIPS water solvable filament for support is not expensive anymore). At the same time I do not print fast large object so large plate and stiff contruction (like GATE has) is not that relevant. As GATE manufacturer does not offer second extruder kit in long term I am moving to different printer.
Any clues what 2 extruder printers are worth looking at?
Anything worth looking at is nearly twice expensive. I looked first at Velleman K8400 for 3500pln/$1000 (with 2 extruders option, without hot bed) just to be quickly slapped on reprap forum for comparing it to gate-class construction 🙂 I am investigating Duplicator 4/4s but it has significantly smaller hot-bed… tough choice so I put investigation on hold…