If you are into electronics you probably know this very popular digital oscilloscope for amateurs. You might hear about its very annoying affliction: noisy stock fan. You need 5 euro and 20 minutes to make this device virtually soundless.
Since you have to open the box, modification voids your warranty! Be warned. I did not care since I have imported this device directly from Hong Kong two times cheaper comparing to local reseller, and immediately hacked it, making 50MHz DSO working at speed of 100MHz as if it was DS1102E (which made total costs even lower). Anyway, I prefer listening to music instead of spinning fan, so I decided simply replace the fan.
Some people consider airflow distribution, temperature stability, etc. or they mount 80x80mm fan in place of original 60x60mm and so on. My view was much simpler: if I can provide a fan, same size, same airflow efficiency, but more quiet, then I am done. And I did it this way.
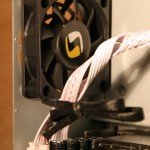
I bought already tested fan – Silentium PC Zephyr 60 – for 4 euro, plus 1 euro for shipment. I use Zephyrs in my PC and they work well for over than one year. This model fluid dynamic bearing suspension, makes 17,9 dB of noise at speed of 2500rpm pumping 19,8 CFM (33,66 m3/h). Silicon spacers make it even more quiet.
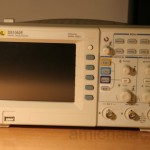
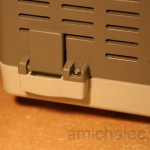
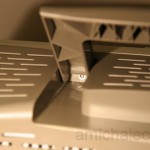
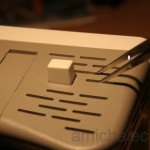
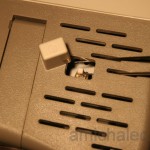
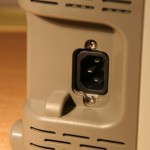
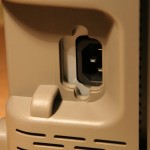
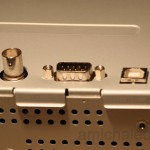
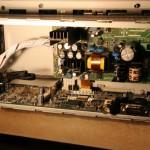
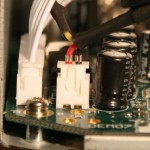
I think most tough part was opening the box without scratches or any other damages. As always, it is quite simple if you did it at least once :] The photo-story below should make it really easy.
Note: review comments below to see alternate approaches in case opening!



Pingback: オシロスコープの静音 | 犬山回路研究所
Thanks for the guide!
I found it impossible to do step 4b (slide cover over the power socket screws). This is what I had to do:
* Unscrew the power socket screws, even though the article says not to. The screw nuts on the other side are loose, so I had to keep unscrewing at different angles and with the screws upside down as well, until they finally came loose
* Remove the plastic cover and then remove (and discard or save somewhere) the grey plastic bracket underneath the plastic cover around the power socket area. This bracket looks like it was put in place to prevent users from opening the cover, and serves no other purpose that I could see
* Remove the metal cover
* Locate the loose nuts by shaking the unit gently at different angles until they fell out
* Reassemble the loose nuts (with the attached spacers facing the cover) and screws on the power socket. The cover can now slide over the screws with no problem, since the grey plastic bracket is no longer in the way. And future opening and closing will be very easy.
Eduard,
I agree with you, 4b is tricky one. First time I unscrewed these screwes, but then I tried what other said about not unscrewing: I used very thin flat screwdriver to lift up the plastic cover a bit, make a lever, watching not to bend too much, and shift cover over the screwdriver; I could do that because the cover is flexible enough. Your are right that for first timers it is better to simply unscrew it. Thanks for input, it will guide others even better :]
I found removing the back quite easy once you worked out how. My first attempt was to try and get a screwdriver under the plastic hole surround but that got me nowhere and I just scratched the plastic part and the metal underneath.
What worked for me was to put a big screwdriver – the bigger the better – through the loop next to the socket then so that it was sticking out past the corner of the plastic casing. ie you have a bar running from left to right of the photo, through the plastic loop in (4b) then gently pulling the screwdriver on the right side of the loop toward the camera, levering on the back corner of the case, the casing can be eased over the socket. Once you have the case over the front edge of the socket you can stop pulling on the screwdriver. The only difficulty is that it is awkward to move the case backward while pulling the screwdriver toward you so something to pry the case backwards sometimes helps – I used a plastic spudger. I’ve removed the back a number of times without problems or marking anything. Note when putting the back back on if it has come off, the the plastic oval part must be fitted the correct way around – it’s wedge shaped.
I removed the on off switch with a dining knife through the horizontal slot in the side.
I just wanted to thank you for this article and its detailed disassembly instructions.
Things like this make life easier.
Where can I buy a Selentium PC Zephyr 60 fan in North America??
Silentium is local brand, you won’t find it anywhere outside this part of Europe. I would recommend to look for any high quality fan with similar parameters. Drop me a PM if you are desperate and want me to send you a Zephyr 😉
-andy.
Hi,
The noise made a family crisis. I found the fan below. What do you think?
Thank you,
Haim Rodrik
https://www.amazon.fr/AAB-Cooling-Ventilateur-Silencieux-Vibrations/dp/B01HTNI3D6/ref=sr_1_fkmr0_1?__mk_fr_FR=%C3%85M%C3%85%C5%BD%C3%95%C3%91&keywords=silentiumpc%2Bzephyr%2B60&qid=1706477732&refinements=p_n_feature_three_browse-bin%3A85902209031&rnid=85902024031&s=computers&sr=1-1-fkmr0&th=1
Note: My scope s DS1102E
Thank you for this how-to. I used to find the fan noise deafening, now it’s really quiet.
The hardest part (by far), was obtaining this particular Zephyr 60 fan from a website in Poland not designed to sell worldwide and not accepting credit card or Paypal…
In the end, it was worth it !
Thanks very clear and convincing explanation. Indeed you need to lift the cover a bit at the power entry in step 4. Used a RECOM RC-6015 fan, which is comparable to the Zephyr 60.
After having used the DS1052E for a year I became so annoyed with the fan noise that I followed the instructions above. I DID remove the two screws of the power socket since otherwise the back of the housing would not come off. The two screws can easily be removed by first loosening them somewhat and then pulling them outwards with thin tweezers clamped behind the head of the screw whilst turning the screw loose with a torque screw driver. The nut on the inside is thus kept fixed against the inner side of the power socket and will not turn when the screw is turned.
I installed a Wallair 60x60x25mm fan that I had handy after having tested that its noise was much less than the original fan. There seems to be less airflow than before, but the scope does not get warm at all after hours of use. Operating the DS1052E is now much more fun than before! I still wonder why our friends at Rigol cannot pick a somewhat quieter fan…..
Many thanks for the article!
Lifting the case over the tab around the power socket can be facilitated by threading one or two sturdy strips of plastic (I used cable ties) through the top and bottom vent holes near the front of the unit. Curving the cable ties makes threading them surprisingly easy:
http://home.arcor.de/kiteki/misc/IMGP2851_1000x.JPG
http://home.arcor.de/kiteki/misc/IMGP2852_1000x.JPG
Now pull on the cable ties to lift the case over the power socket:
http://home.arcor.de/kiteki/misc/IMGP2853_1000x.JPG
Voilà!
Thanx for sharing another approach, your photos are linked correctly 😉
-andy.
Interesting.
Q. Is swap necessary with new rigols? Checked new noise-level video on actual scopes.
They measure DS1052E and DS2000 with noise-meter -you can hear levels on soundtrack:
Seems pretty good for me…
DS2000 line is pretty quiet (as people report on eevblog forum). It is more important now as no BW hack is known to 2k series which increases chances of purchase from local reseller with warranty, which in turn would void when device is taken apart.
Edit: After moving to DS2072 (also with upgrades) I rate its loudness between stock and silent fans in DS1052. No mods to DS2072 however as it is on EU warranty.
http://www.youtube.com/watch?v=DYCd_Fr7Xaw
Silentiumpc is near impossible to find outside Poland.
Even more quiet and more common is i.e. Papst 612N – only 16dba
thanks for the article, i have changed the fan of my rigol, now is much better!!
Many thanks to those that posted. A BIG help in voiding my warranty. :0)
I couldn’t stand that racket and I’m half deaf, even; so… I just stuck a 50 ohm (2 x 100 ohm 1 watt – in parallel) resistor in series with the stock fan. Fan seems to start and run just fine but lots quieter. Fan actually started on 3v. Would guess its running on about 6v now while keeping some air moving in the box. Hope it’s enough.
Be careful with slowing down factory fan, watch the temperature of the unit as the air flow is lowered now and device may overheat in some conditions. I would suggest fan replacement with some more silent version having similar or higher rating of airflow.
Thanks for this nice article.
I also changed the noisy fan. I used a 60 mm Noiseblocker BlackSilentFan XR2.
This silent fan has less air flow then the original fan, but will cause no problems with my solution as described below. I did some temperature measurements inside the closed scope with a little temp probe and so I could watch temp. differences with original and modified fan. Only DIFFERENCES are relevant, not the absolute temp. values because the measured absolute values are very depending on the spot where you mount the temp. probe !
The problem area is the power supply. There is a power supply pcb with a device mounted on a large cooling block that really gets hot. This is problem number one.
With the new fan mounted, the temperature of this cooling block rises about 3 degrees Celsius at a room temperature of 24 degrees C. That’s no big rise but there is an easy trick to get it lower. It has to do with the actual flow of the air inside the unit. When you look at the inside, you will notice that there are a lot of holes in the cabinet, also very near to the fan. The trick is to block this holes near the fan to create a better air tunnel drawing more air from the hot areas in the cabinet and without air leakage near the fan. So I blocked 14 holes in the 4 rows of holes on the metal top cover of the cabinet near the fan with 2 tapes and also 11 holes in the horizontal 2 rows on the back cover near the fan.
The result is a decrease of the temperature of the cooling block on the power supply pcb with 3 degrees, so now I have the same temperature on this spot as in case when the original fan was used.
I just created a better air tunnel creating more air flowing along the hot cooling block.
Heat problem number two has also to do with power supplies: the 7905 voltage regulator mounted below the fan is also getting hot. Here there is no cooling tab mounted at all, so every little cooling tab will give a relative big improvement.
I managed to mount a small piece of right angled aluminium plate on this regulator acting as a cooling tab. This is a more difficult job, but I thought it was better to do this, because this regulator is not right in the air flow of the fan.
Hope people can use my solution, kind regardes, LvdK .
Interesting mod, thanx for sharing details!
Thanks for the idea. The holes near the fan effectively ‘short circuit’ the airflow reducing the effectiveness of the fan.
I also blocked the vertical row of holes near the fan on the back panel.
With the stock fan, I noticed a significant reduction in the temperature of the heatsink on the power supply board after blocking the holes.
Worked like a charm! Thank you so very much!
Replaced the fan with a 10 CFM one (Noiseblocker XR-1). Up to now I did not encounter any problems at all (temperature-wise) and the 1052 is nearly inaudible. Great osciloscope, IF you have a silent fan + 100 MHz hack. :]
BR!
Very nice guide, thanks.
But the screws are Torx T10, not T8 like stated below the first picture.
Apparent oversight, corrected 😉
Thanks to Fureddo for his cable-tie idea for getting the back cover over the power socket !!