
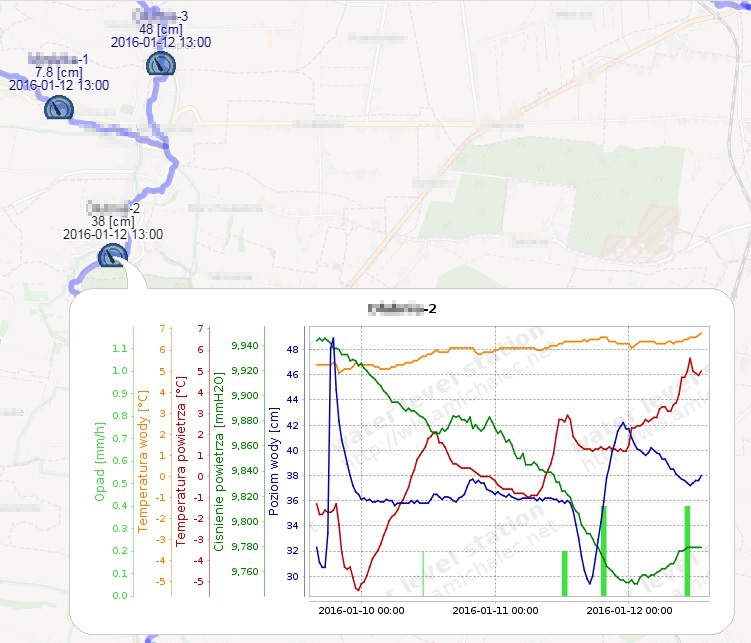
Water level monitoring on river basin under observation was completed mid 2015. From rainfall-rainoff modelling perspective rainfall capturing was missing. Low budget, 3d printer at home and some spare time pushed me to design my own rain gauge. Before autumn rains all required stations received tipping bucket pluviometers upgrade.
Mechanics of tipping bucket gauge I use in test station for last 2 years is based on simple concept of magnet attached to bucket and reed switch fixed in the base. Each swing makes a reed pulse that is detected by counting circuitry in logger box. For observed river basin 3 rain meters were needed. Cheapest gauges from the market would take at least $300 for this equipment so I made an attempt to replicate this mechanics myself.
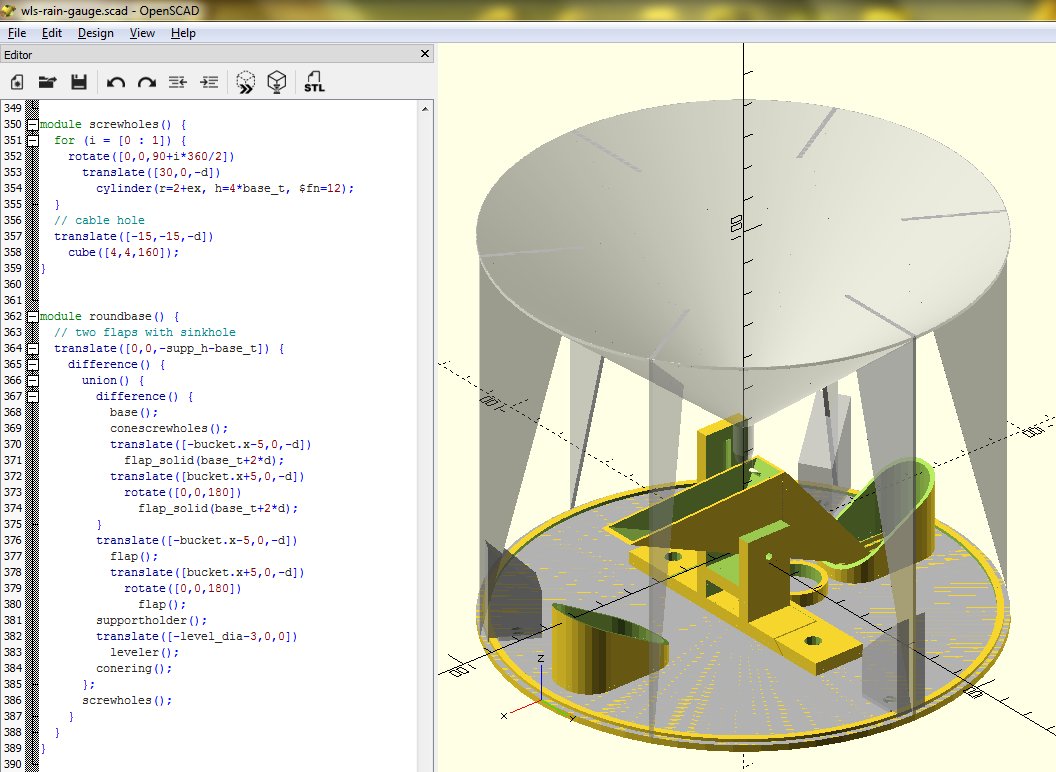
OpenSCAD design
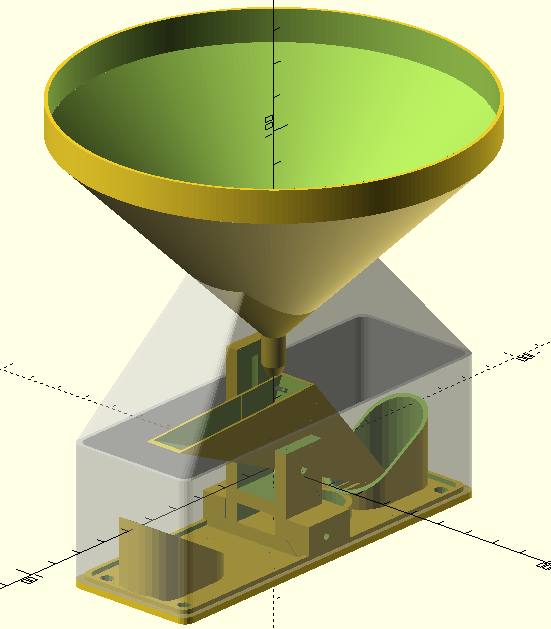
The core problem to solve was calibration. Commercial solutions allow to attach extra weight to bucket to calibrate swinging rate. It makes physical shape of bucket unnecesarily complex that turns into more time to spend on CAD and test prints. For 3 items I opted for fixed calibration. Bucket design in that constraints is simplistic: two adjacent triangles with pivot point in the middle. I was not sure whether I need ABS or I could stick to PETG that is easier to print. Different materials means different density so the bucket weight and any upfront size-based calculations would differ significantly. Viscosity that would hold droplets in corners and walls adds to total error. Solution was simpler – first I printed a bucket and base, mounted magnet and reed and flushed known amount of water thru it (like 0.2L) to count pulses. From that number I could derive required area of inlet and print cone and the whole cylindric casing matching calculations.

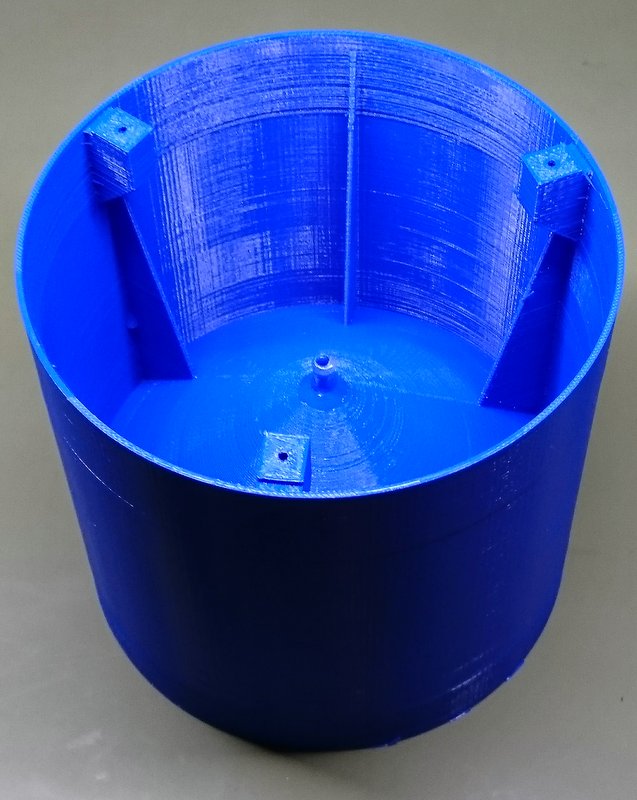
Gauge base
Gauge cone
Drops stuck (left) viscosity issue
Since gauge resolution is mainly derivative of area of gauge inlet I had to balance it to save on material: from calculations to get down from 0.2 to 0.1 [mm] I would need double printing material. So I have choosen 0.2 grade.
First design settled with 147 [mm] diameter (~170 [cm^2] of working area) and 0.2 [mm] resolution. Total volume print would require 16.5 hours of printing and roughly 72 [m] of filament, that for ABS gives 0.18 [kg] weight. Results were satisfying but I notices that I can save on material changing general shape and making walls thinner.
2nd version design
Second version used a little smaller bucket that turned into 120 [mm] diameter and 115 [cm^2] of working area at the same 0.2 [mm] resolution. This time total printing time went down to 10 hours, taking 43 meters of ABS filament, producing lighter 0.11 [kg] raing gauge.
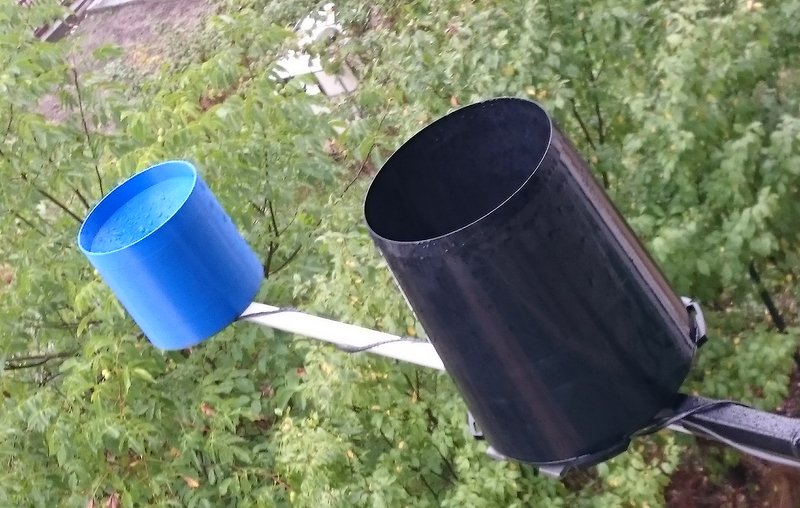
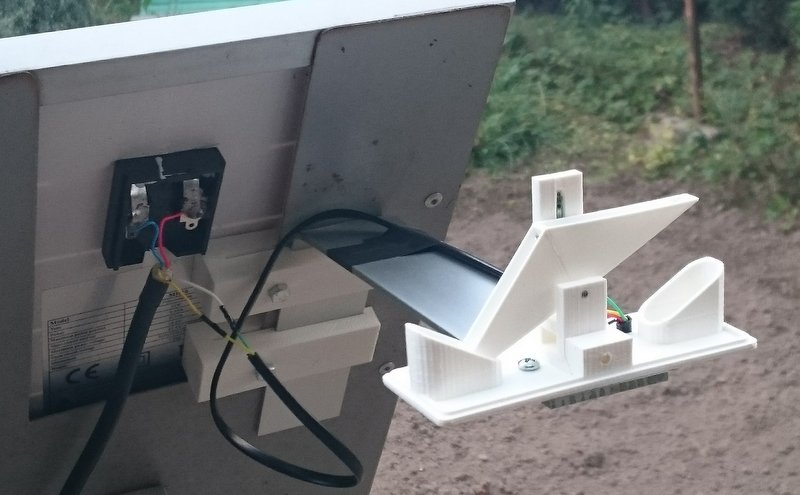
Update to stations hardware was ment to be as lightweight as possible; I wanted to limit power tools usage and avoid modifications to existing elements. I managed to attach bent aluminum bar to existing construction using 3d printed clamps. The only drawback is stiffness of the arm; in really strong wind the arm can vibrate vertically trigerring pulses early and distort readings. That was another tradoff made in self-sponsored experiment. Over next years time will tell how useful is data collection.
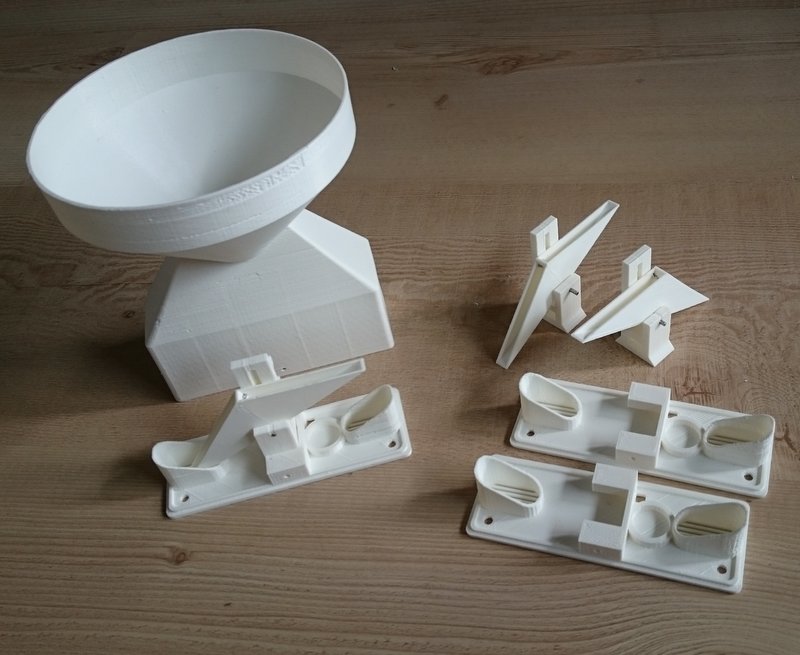
Serial printing for 3 stations
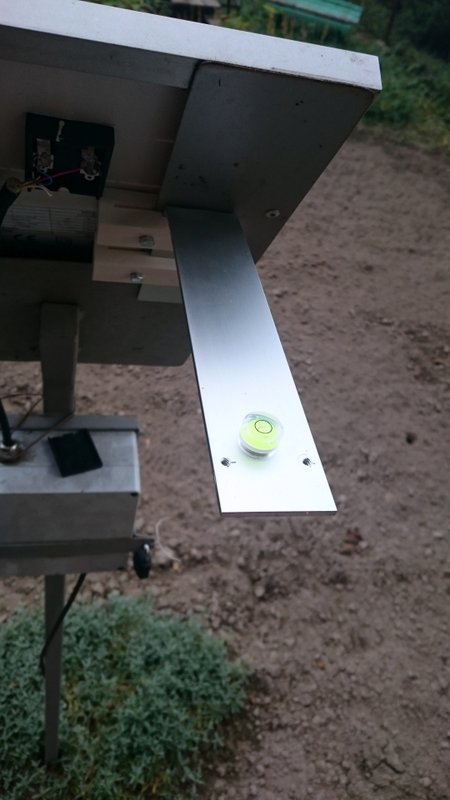
Leveling on assembly
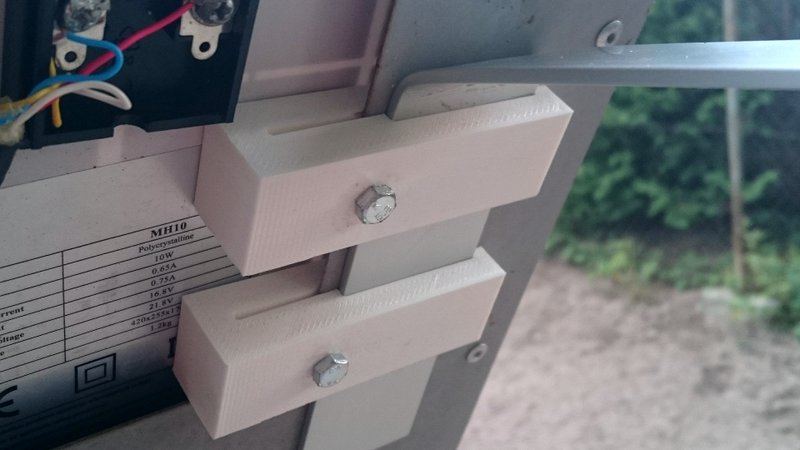
Non-invasive gauge mounting
Aluminum arm holding gauge base
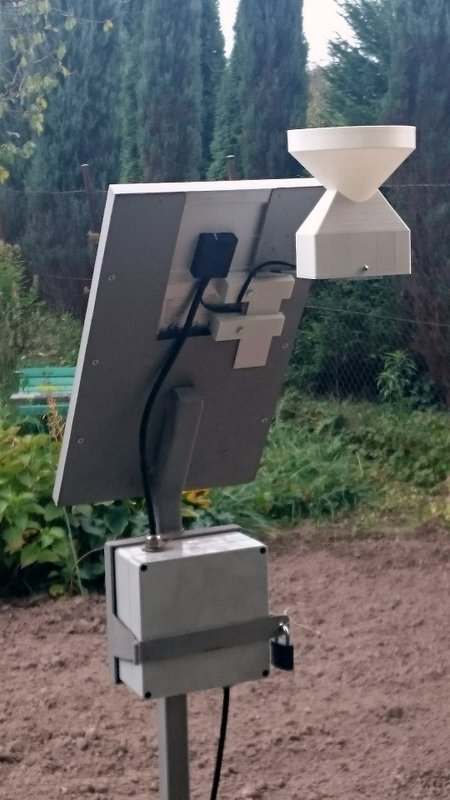
Final effect
Three stations on influent stream, one with rain gauge
[posts_by_tag tag=”WLS”]


Any Chavez of posting the 3d stl files so that others can make their own as well?
Hello,
My name is Franz Hund, I live in Germany. I want to build a weather station. Can you email me the stl-Filles?
Thank you for the effort!
Franz
Hi,
I’m Ajay Pawar from India. I want to make tipping bucket Rain Gauge. Please send me 3d sstl file on ajaypawar2412@gmail.com.
We are looking forward to your reply.
Thank You,
Ajay Pawar
To all visitors: asking for STL files makes no sense. If you read my post you will find I have printed in two phases. First tipping bucket for calibration, and then, based on results I modified CAD parmeters to generate second STL.
Hi,
I’m Kwan Fam from Viet Nam. I want to make tipping bucket Rain Gauge. Please send me 3d sstl file on quan.pham4591@gmail.com.
We are looking forward to your reply.
Thank You,
Kwan Cheng Fam
Hi Kwan, see my previous reply why I will not send you STLs.
-andy.
Hello,
Based on the screenshots I assume that you used OpenSCAD for designing the rain gauge. I understand that you do not want to share STL files, but maybe you can share files in OpenSCAD format?
I was trying to print other project from https://www.thingiverse.com/thing:2757560 but I find it difficult and material consuming.
Your project seems to be better designed for 3d printing.
Thanks,
Michał
Any chance to share OpenScad files?